
Success doesn’t happen by accident.
After being contacted by the general contractor, we met on site to go over the possibility of installing a snowmelt system for the more than 2,000-square-feet of sidewalks, which also included two ADA-sloped approaches to the grand entrance, a wide sweeping brick stairway and the landing pads outside the grand entrance. Natural gas was available, and a new mechanical room could be created out of an unused portion of a storage room area on the first floor. The design load was a net 340,000-Btu/h.


Placement of manifold vaults were detailed, and a second redundant modulating condensing boiler was incorporated. The cost was higher than anticipated, so the project was divided up into two phases: the 816-square-foot main corporate grand entrance, sweeping stairway, ADA sidewalk ramps and front sidewalk adjoining both ADA ramps as phase-one (see drawing); and the 1,200-square-foot sidewalks leading to employee parking lots would be phase-two.
The reasoning behind installing a snowmelt system were right in line with typical concerns: Employee and visitor safety by preventing hazards such as: slipping/falling on snow/ice, a major liability exposure; eliminating overtime labor costs associated with clearing snow/ice before arrival of employees, during the business operating hours and until the last employee left for the day; eliminating damage to the bricks, which were spalled from the freeze/thaw cycles as was the concrete; eliminating the use of harsh chemicals which had discolored the brick pavers; and eliminating the need to replace landscaping every year killed off from using chemicals.
Then there were the expenses associated with maintaining snow removal equipment and damages/cleaning expenses caused by foot traffic depositing chemicals on carpets and marble flooring. All of which more than justify the expense of installing and operating snowmelt systems.
Project planning
Best laid plans of mice and men often go awry, right? The edict came down from on high: This was to be an electric snowmelt system! Whoa there Nelly, had anyone considered the operating cost? It’s not at all unusual to incorporate electric snowmelt for relatively small areas, especially when there are no hydronic heat sources available, space is at a premium or fossil fuel sources are not readily available. The thinking here was that electric radiant snowmelt would cost less to install and, in that regard, they were right.
Given that part of the job for anyone designing snowmelt systems is to be an advisor so the client can make sound judgment decisions, I prepared a written report illustrating side-by-side cost comparisons on both the upfront installation cost and operating cost for both systems.
I then projected a 20-year forecast of operating cost with a fixed annual increase for the energy sources based on the DOE percentages. Amps x voltage = watts. Watts x projected run hours divided by 1,000 = kWh. kWh x rate = operating cost. The rated 50-watts per square foot for wire placed 3 inches on center equates to 170-Btu/h per square foot. 170 x square footage = net Btu/h. Divide that by .95 (95% efficiency modcon boiler) = gross Btu/h input required x same number of run-hours = total gross input in Btu/h. Divide that by 100,000 to derive therms. Therm x rate = operating cost.
The difference over the 20-year span of time would have more than paid off the added cost to install a hydronic snowmelt system, but the word came back – they wanted electric. My original design also incorporated 2-inch high-density insulation for a faster response time. This too was eliminated, against my advice, by the owner. It’s ultimately the customer’s decision and their money.
Communication is an essential part of any successful snow-melt project and Lucas Hann at Watts became an integral part of my team. (My experiences, more than five decades, has been that all manufacturers are eager to assist contractors so that their products perform flawlessly.) Little did Hann or I know, in the beginning, how crucial his role was to become!
The GC (general contractor) needed to know how to properly slope the concrete pads for runoff of melted snow/ice to areas where no foot traffic would take place and directed to area drains. The construction crew needed to be educated about their responsibilities for protecting the installed snow-melt products and I needed to know exactly where the saw-cut joints would be so that our crew knew where to dive down with the Watts ProMelt cables to keep them out of harm’s way.
Exact specifications were reviewed on concrete thickness, the 2-inch thick layer of brick pavers and how the pavers would be installed. The pavers were to be bonded to the concrete with high-density mortar for transferring heat energy effectively to the surface. Location for our vault where the ProMelt cable leads would tie onto the circuits and precise location of our sidewalk snow-melt sensor were hashed out early on in the project so that I could lay out the grid-pattern for the seven loops of 277-volt cables.
Getting started
Once all the details were finalized, demolition of the existing concrete and concrete/brick paver sections and grand stairway were removed. A new twist arose when someone on the owner’s oversight team panicked regarding the potential for a single wire loop to fail in the future. They wanted a second set of “dummy” wires installed that would not be activated unless that loop failed. Lucas and I traded emails and site pictures until the addition of unused not connected ProMelt cables were approved.
The first targeted area was the lower sidewalk (see video at www.pmmag.com)and was completed just prior to my family vacation. ProMelt cables were zip-tied to the 6×6 mesh wire with chairs utilized to keep the snowmelt cables 2 inches below the surface of finished concrete to enhance response time from dead-cold slab to melting snow/ice. Our first of several electrical inspections was scheduled prior to the first pour of new concrete.
The electrical inspector took it upon himself to decide how the sidewalk with brick pavers was being constructed without asking anyone for the facts. He assumed a layer of sand was going to be placed between sidewalk and brick and pronounced this system would not melt snow! This he did in front of the owner’s team. All those hours spent working with Hann to ensure the design was going to perform as anticipated by all went south in an instant.
Fortunately, an email alerted me to this sudden glitch and a flurry of emails and phone calls prevented a total meltdown of the project. Lucas Hann more than earned his keep over the course of that day! Although the crisis was settled, a seed of doubt once planted won’t go away until the system has been tested under actual snowmelt conditions.
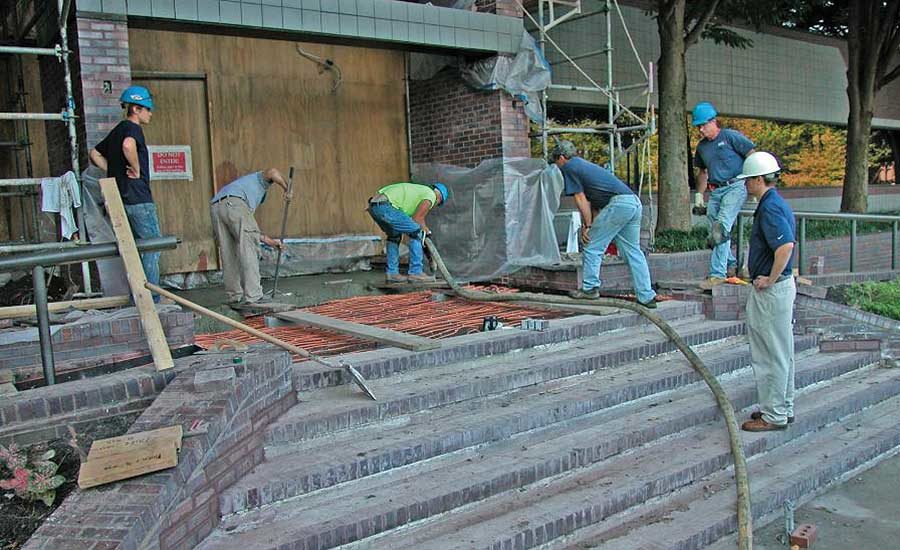
The remainder of the installation progressed without any more issues. The concrete contractor was very careful regarding protecting the radiant products and installed planks over the areas for workers and supporting the concrete pumper hose with its metal flanges.
As we always do, no matter if it’s PEX tubing or electric cables, we are on site during every concrete pour and surface finishing event. For this system, each loop had an alarm connected that would squeal if a radiant snowmelt cable were cut or damaged. Materials were on hand if damages did occur so that cables could be replaced if needed.
System setup
We had set up this snowmelt system as follows:
The Tekmar control is connected to an outdoor air temperature and slab sensor so that it knows the outdoor air and slab temperatures.
The Tekmar control is programmed to disable the system if outdoor air rises above 60° F.
If outdoor air temperature falls below 60°, the controller will look at the slab temperature and if it falls below 42°, the slab will be idled at 36°.
The slab sensor will prevent the electric relays from being activated until the slab falls below 36°.
If the sensor gets wet or senses ice or snow, the slab will be energized and stay on until it achieves 42° or the sensor is dry. If the sensor goes dry, the system will remain on for another hour (can be changed).
If they hit the Tekmar manual “ON” button, the system will be activated for 4-hours with a 1-hour run past the sensor being dried off. They can activate this feature if, for example, a weather report predicts snow or icy conditions. Shouldn’t be necessary, but it’s there if they want it.
They were now in fully automatic mode. In theory, they no longer needed to interact with the system.
The first snow event arrived, and I visited the site to check on the performance. The snowmelt areas were essentially free of snow, surface temperatures were recorded (see additional photos at pmmag.com), and the seed of doubt planted by the inspector, that had shadowed the installation, was finally uprooted once and for all.
Success like this doesn’t happen by accident. I received exceptionally great training via the Radiant Professionals Alliance (www.radiantprofessionalsalliance.org) that has provided the confidence needed to tackle both large and small radiant snowmelt projects.
This article is also available at: https://www.pmmag.com/articles/102321-dave-yates-corporate-grand-entrance